

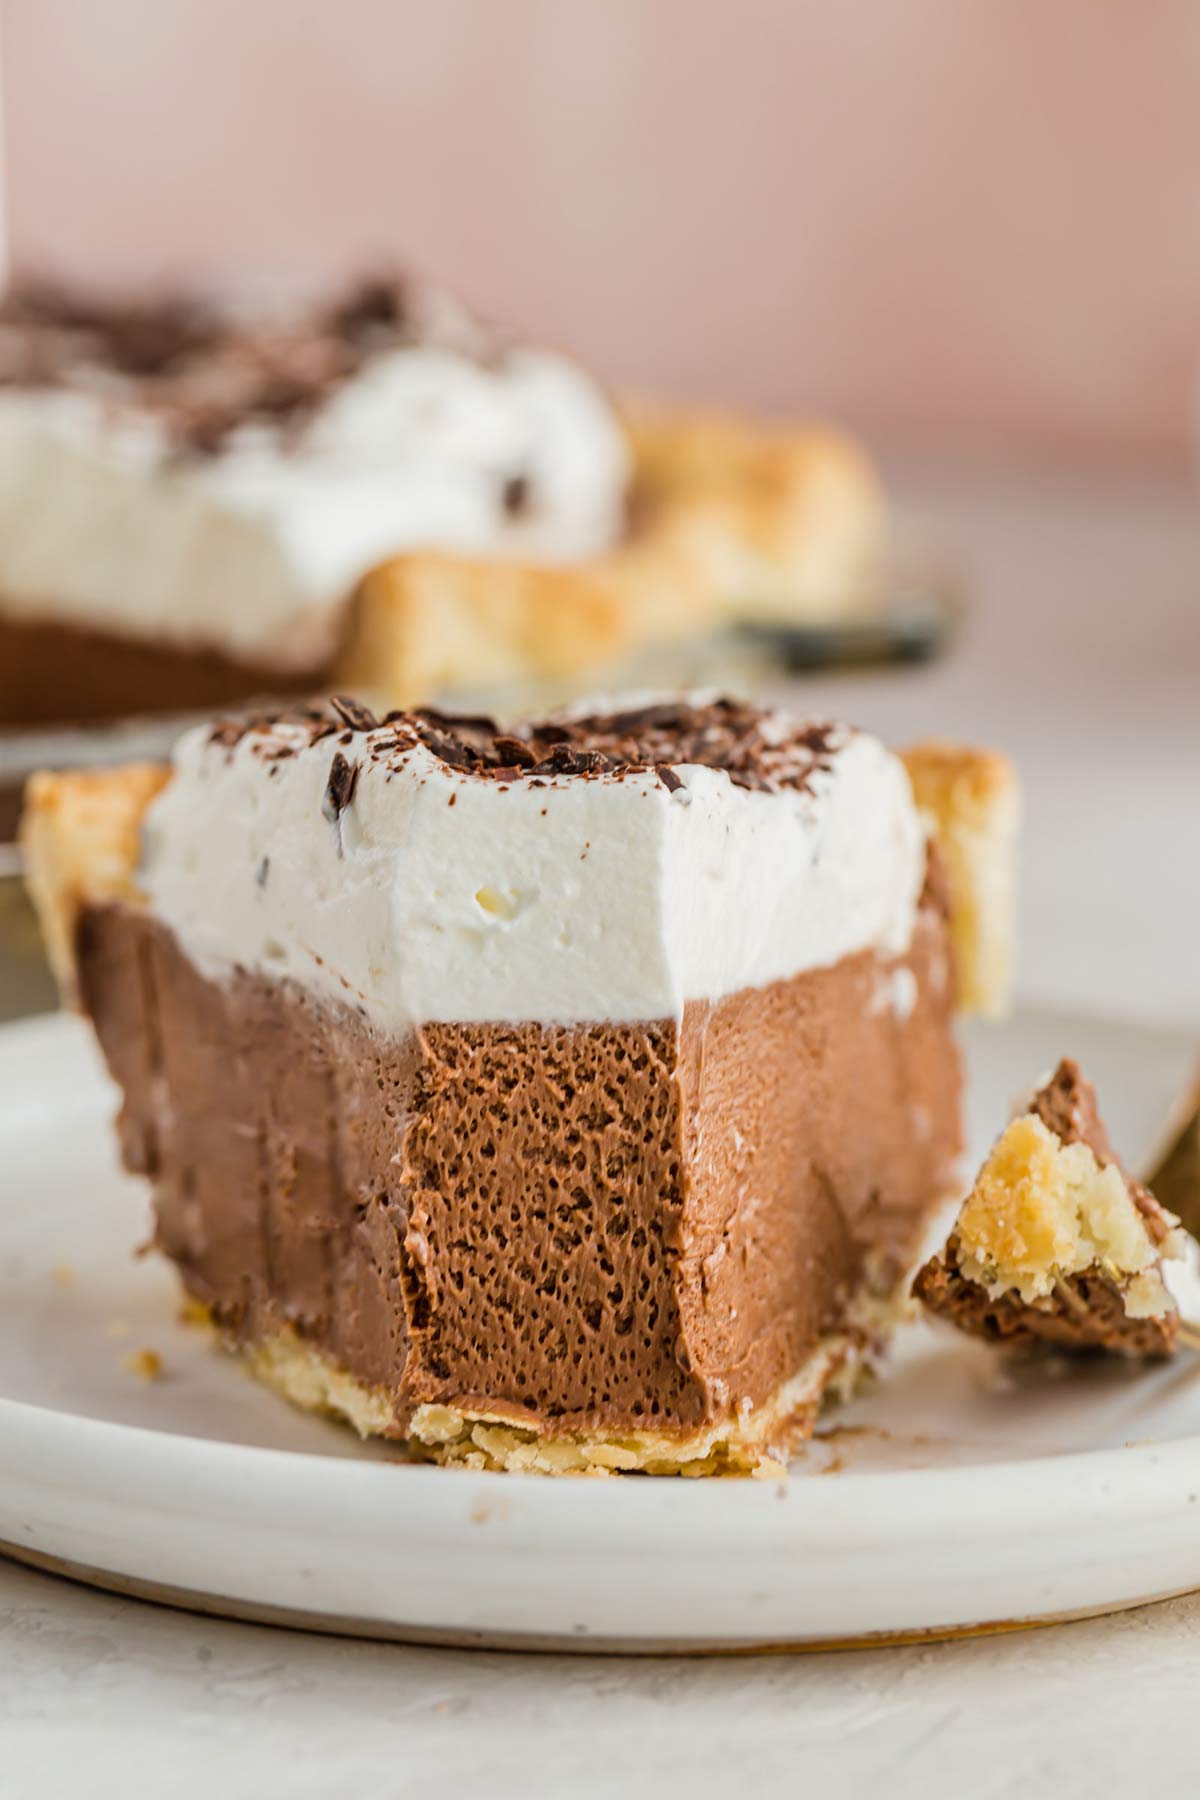
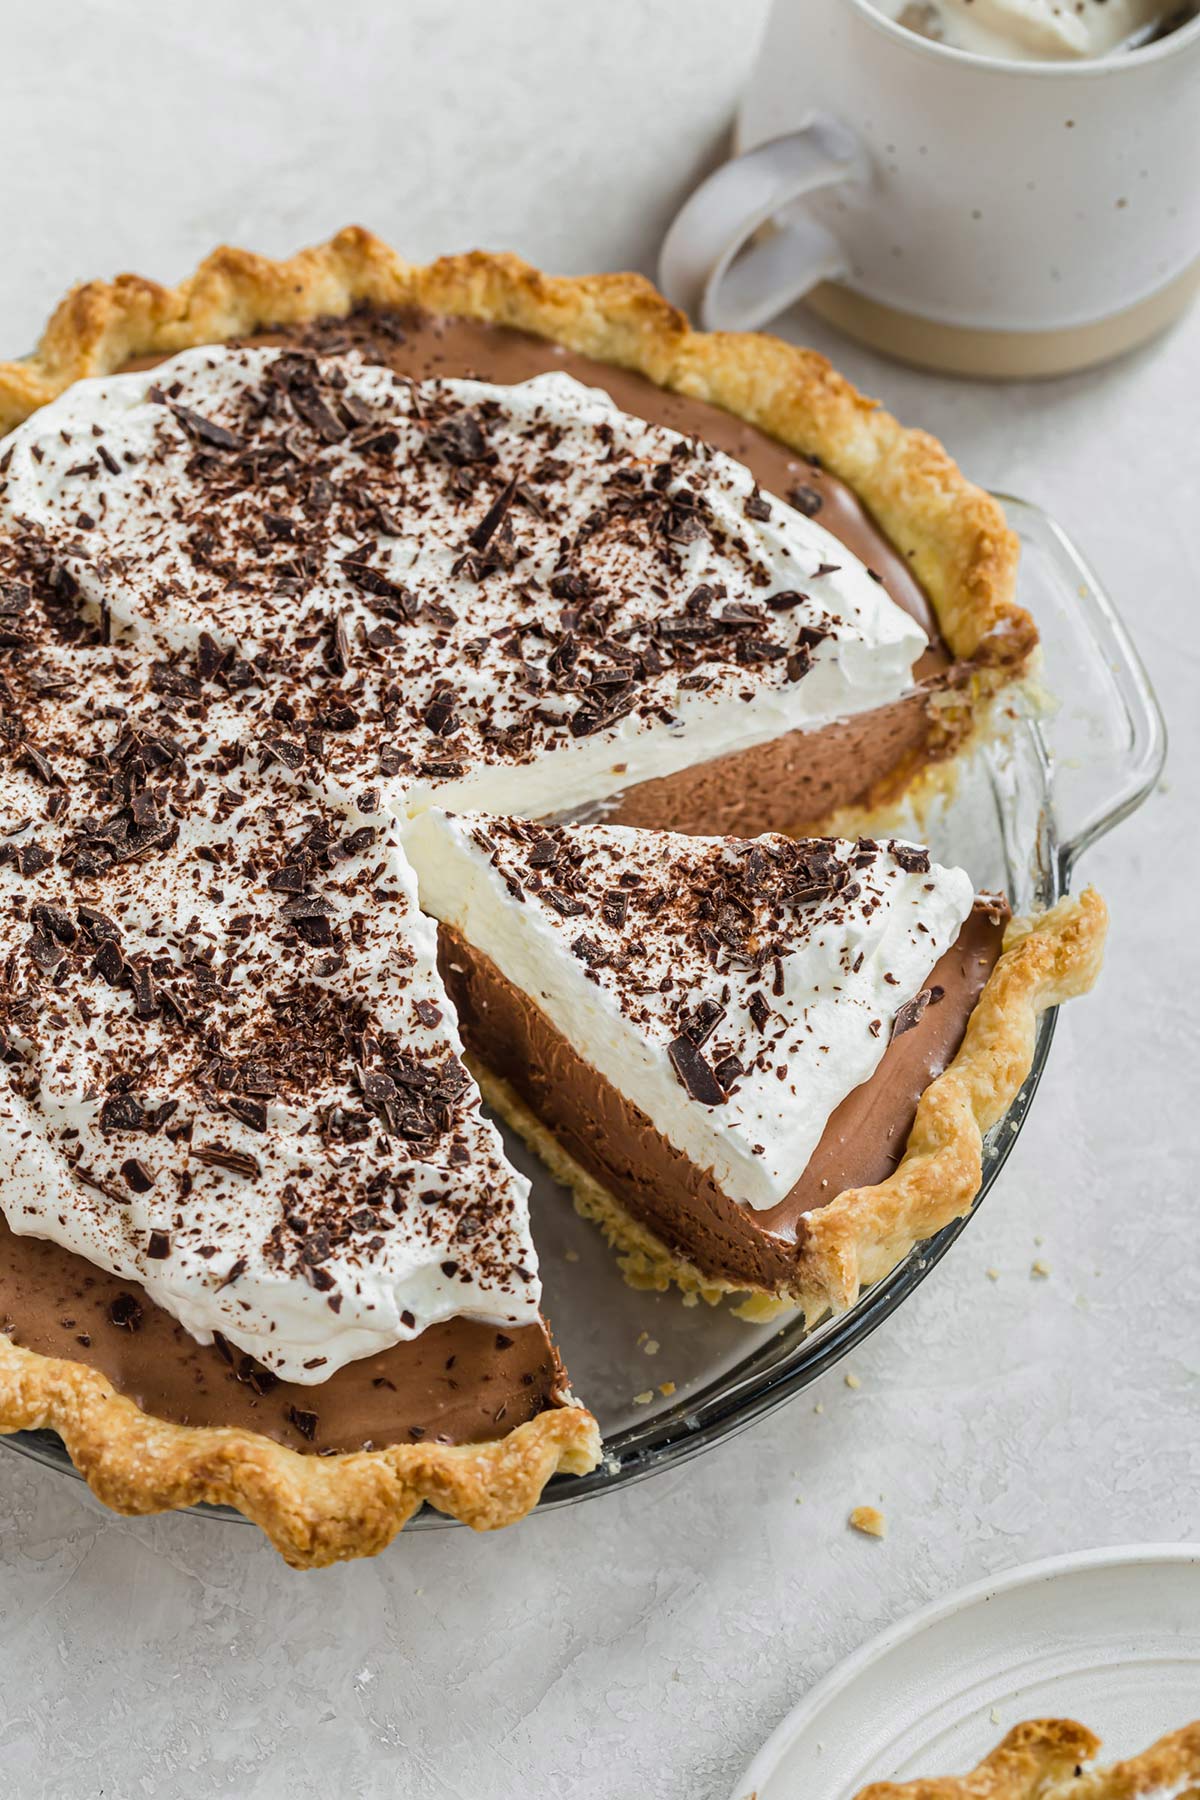
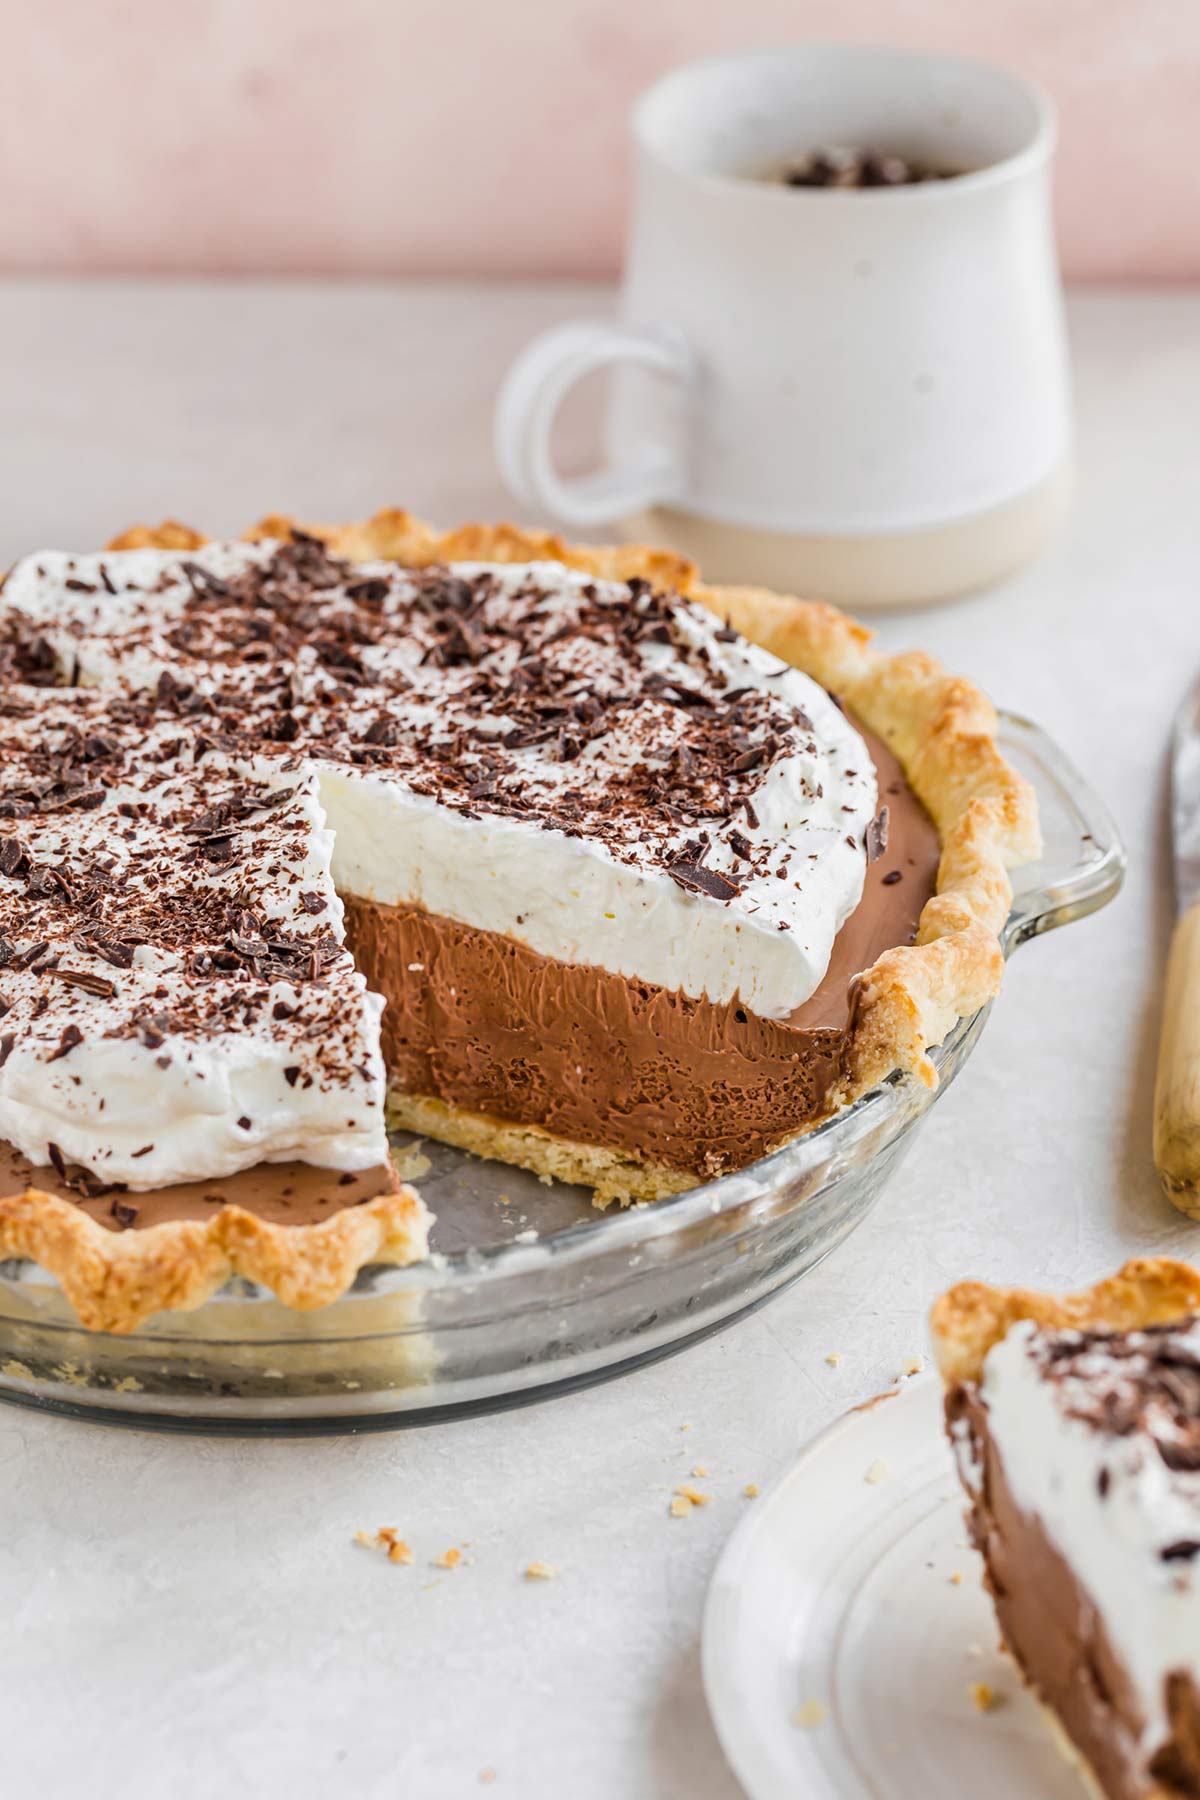
Rich and creamy French silk pie features my favorite pie crust, a silky smooth, mousse-like chocolate filling, and fresh whipped cream. Sprinkle with some chocolate curls and you have an absolutely unbelievable dessert. The best part? No raw eggs!
Ages ago, I resisted trying French silk pie for the first time. And do you know why? I couldn’t get past the pie crust + chocolate combination. Am I crazy or what?!
I had compartmentalized desserts in my brain, and pie crust was reserved for things like fruit, pumpkin, and pecans. Chocolate, on the other hand, was reserved for… everything other than pie crust? I know it makes zero sense! The only chocolate-based pie I had made before this one (chocolate cream pie) had an Oreo crust. I just wasn’t sold that chocolate and traditional pie crust were a good combination.
Clearly, I was wrong. Very, very wrong.
Best French Silk Pie Recipe
Here’s why you’ll love this easy chocolate silk pie:
- Each part is made completely from scratch
- No raw eggs in the chocolate filling!
- A wonderful make-ahead dessert
- Always impresses a crowd
- Great for holidays, celebrations, and whenever that chocolate craving hits
French Silk Pie Ingredients
I highly recommend using quality ingredients; you’ll certainly taste the difference! Here’s what you’ll need (full recipe and ingredients found below):
- Pie Crust: I love using my all-time favorite pie crust for the base of French silk pie.
- Heavy Cream
- Chocolate: Make sure to use bittersweet chocolate for the chocolate filling. I recommend Ghirardelli 60% Cacao Bittersweet baking bars.
- Eggs
- Sugar
- Vanilla Extract
- Butter
- Whipped Cream
No Raw Eggs!
Most French silk pie recipes use raw eggs without any sort of tempering to bring them up to a safe temperature. I’m not one to shun from a few beater licks of raw cookie dough, but I just couldn’t get past a pie made with completely raw eggs.
I was thrilled when I saw this filling recipe from Cook’s Country that calls for heating the eggs to a safe 160 degrees F as part of the recipe. It appeased my raw egg neurosis and the final product is so silky smooth; holding its own in comparison to its raw egg counterpart.
How to Make French Silk Pie
Let’s talk about how this French silk pie comes together:
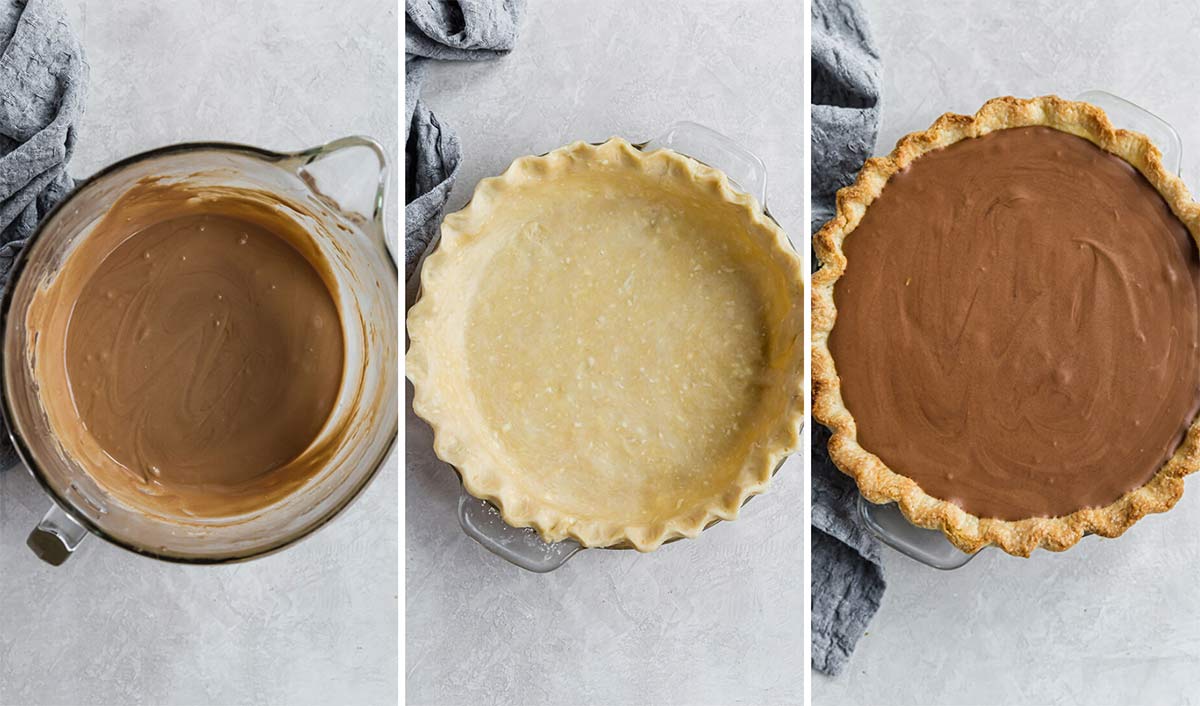
- Pie Crust: Prepare and bake a pie crust. I recommend my favorite pie crust for this recipe, but use your favorite version. You can even buy a prepared pie crust at the store for a super short cut (although I obviously advocate for homemade always!).
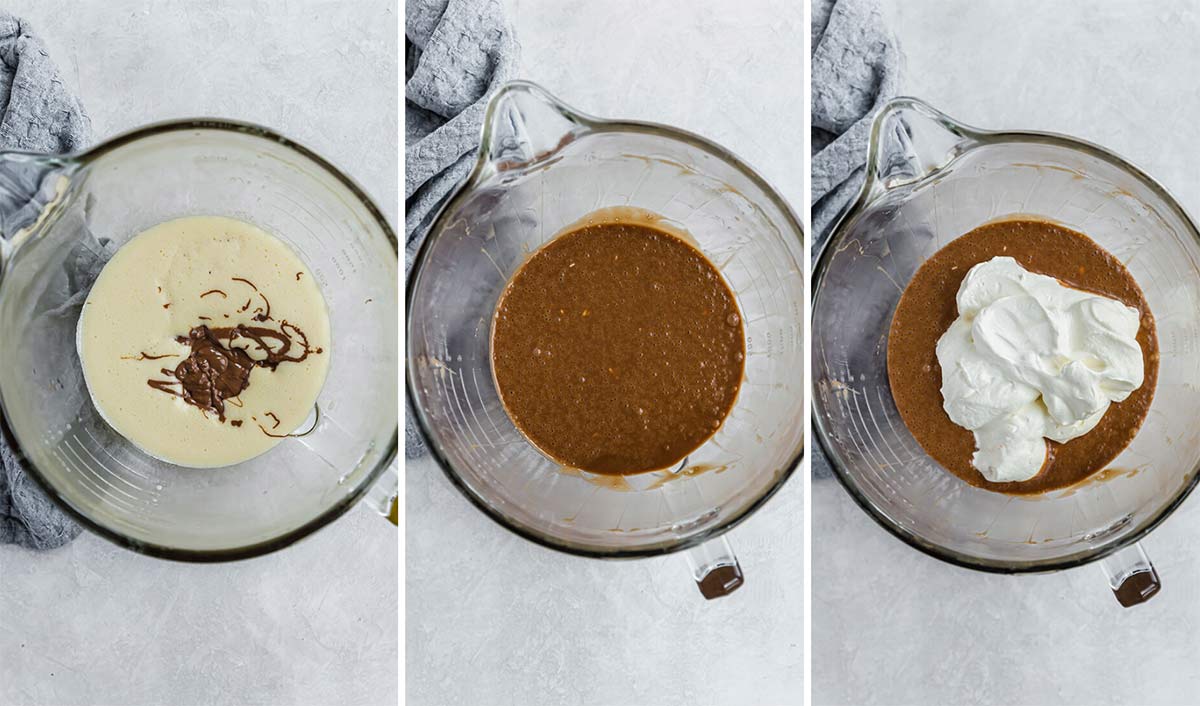
- Whip Cream and Melt Chocolate: Separately, you will beat whipped cream to stiff peaks and then melt the chocolate until smooth.
- Make the Filling: Warm the eggs and beat until they’re light and fluffy. Add the melted chocolate, vanilla, and butter. Once everything is combined and smooth, fold the whipped cream into the chocolate mixture.
- Fill the Pie: Spread the chocolate filling in the pie shell and refrigerate for at least a few hours or overnight.
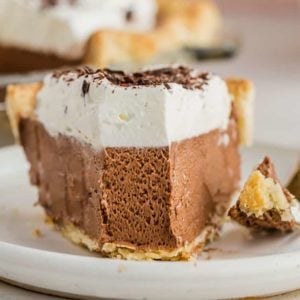
- Serve: When ready to serve, top with fresh whipped cream and chocolate curls!
Note: I do believe that the silky texture of French silk pie is best enjoyed when served at room temperature. Let the chilled pie sit out for 20-30 minutes before serving.
Make Ahead, Storage, and Freezing Tips
- Make Ahead: This is a wonderful dessert to prepare ahead of time! There are a couple ways to do it: 1) Make the pie crust 1-2 days in advance, 2) Prepare the pie the day before you need it and refrigerate overnight, or 3) Freeze the prepared pie for up to 3 months (see below for more details).
- Storage: French silk pie must be refrigerated. Keep any leftovers in the refrigerator for up to 3 days.
- Freezing Instructions: Once the pie has been chilled in the refrigerator, cover tightly with plastic wrap, then foil, and freeze for up to 3 months. Thaw overnight in the refrigerator, then top with the fresh whipped cream and serve.
As it turns out, buttery, flaky pie crust makes a phenomenal vessel for velvety smooth chocolate filling. Truth be told, I could have eaten this pie filling with a spoon and just said to heck with filling the pie crust and letting it chill!
Skeptical of the pie crust/chocolate combination at first, I ended up trying to hoard the entire pie for myself. Lesson learned. Never second-guess anything when it involves pie crust or chocolate. Please tell me I’m not the only one with crazy food combination issues!
Try These Chocolate Pies Next
Every chocolate lover in your life will love these pies and tarts!
French Silk Pie
For the Pie Crust:
- 1¼ cups (156.25 g) all-purpose flour
- ½ teaspoon (0.5 teaspoon) salt
- 1 tablespoon granulated sugar
- 6 tablespoons unsalted butter, chilled, cut into ¼-inch slices
- ¼ cup (51.25 g) solid vegetable shortening, chilled, cut into 2 pieces
- 2 tablespoons vodka, chilled
- 2 tablespoons ice water
For the Filling:
- 1 cup (238 ml) heavy cream
- 8 ounces (226.8 g) bittersweet chocolate, finely chopped
- 3 eggs
- ¾ cup (150 g) granulated sugar
- 2 tablespoons water
- 1 tablespoon vanilla extract
- 8 tablespoons unsalted butter, at room temperature, cut into ½-inch pieces
For the Whipped Cream Topping
- 1 cup heavy cream
- 2 tablespoons granulated sugar
- ½ teaspoon vanilla extract
To Garnish
- Chocolate curls, optional
-
Make the Crust: Process ¾ cups flour, salt, and sugar together in food processor until combined, about 2 one-second pulses. Add butter and shortening and process for 10 seconds (dough will resemble cottage cheese curds with some very small pieces of butter remaining, but there should be no uncoated flour). Scrape down sides and bottom of bowl with a rubber spatula and redistribute dough evenly around processor blade. Add remaining ½ cup flour and pulse until mixture is evenly distributed around bowl and mass of dough has been broken up, 4 to 6 quick pulses. Empty mixture into medium bowl.
-
Sprinkle vodka and water over mixture. With rubber spatula, use folding motion to mix, pressing down on dough until dough is slightly tacky and sticks together. Flatten dough into 4-inch disk. Wrap in plastic wrap and refrigerate at least 45 minutes (or up to 2 days).
-
Preheat oven to 425 degrees F. On a floured work surface, roll the dough into a 12-inch circle. Transfer the dough to a 9-inch pie plate and gently ease the dough into the pie plate. Leave any dough that overhangs the plate in place, wrap the dough-lined pie plate loosely in plastic wrap and refrigerate until the dough is firm, about 30 minutes.
-
Trim the overhang to ½-inch beyond the lip of the pie plate. Tuck the overhang under itself (the folded edge should be flush with the edge of the pie plate). Crimp the dough around the edges. Wrap the dough-lined pie plate loosely in the plastic and refrigerate until the dough is fully chilled and firm, about 15 minutes.
-
Line the chilled pie shell with a double layer of aluminum foil, being sure to cover the edges as well, and fill with pie weights. Bake until the pie dough looks dry and is pale in color, about 15 minutes. Remove the foil and the weights and continue to bake until the crust is a deep golden brown, 8 to 12 minutes longer. Transfer the pie plate to a wire rack and let the crust cool completely, about 1 hour.
-
Make the Filling: Pour the heavy cream into a large mixing bowl and whip on medium-low speed until foamy, about 1 minute. Increase the speed to medium-high and continue to whip until stiff peaks form, 2 to 4 minutes. Transfer the whipped cream to a small bowl and refrigerate until needed.
-
Place the chocolate in a microwave-safe bowl and microwave on 50% power in 30-second increments, stirring after each, until completely melted and smooth. Set aside.
-
In a large, heatproof bowl, whisk together the eggs, sugar and water. Beat the mixture on medium speed until pale yellow and thick, about 5 minutes. Set the bowl over a medium saucepan filled ½-inch of barely simmering water over low heat, and warm the mixture, stirring occasionally, until it reaches 160 degrees F on an instant-read thermometer. Remove the bowl from the heat and beat the mixture on medium speed until it is light and fluffy and cooled to room temperature, about 8 minutes.
-
Add the melted chocolate and vanilla extract to the cooled egg mixture and beat until incorporated. Beat in the butter, a few pieces at a time, until well combined. Using a rubber spatula, fold in the whipped cream until no white streaks remain. Scrape the filling into the pie shell and refrigerate until set, at least 3 hours or up to 24 hours.
-
Make the Whipped Cream: Using a stand mixer fitted with a whisk attachment or a handheld mixer, beat the heavy cream, sugar, and vanilla extract on medium speed until it just reaches stiff peaks. Spread the whipped cream over the top of the chilled pie and garnish with chocolate curls, if desired. Serve immediately or store in the refrigerator, uncovered, for up to 3 hours. Leftovers should be stored in the refrigerator, covered, for up to 4 days.
- Pie Crust – This is my favorite pie crust recipe and a question I get asked often is if the vodka is necessary and if it can be replaced. Yes, it is essential in this particular recipe and you cannot substitute more water and get the same result. If you cannot use alcohol, I recommend using your own favorite pie crust recipe.
- Chocolate – I like to use the Ghiradelli 60% Cacao Bittersweet baking bars for this recipe.
- Freezing Instructions – Once the pie has been chilled in the refrigerator, cover tightly with plastic wrap, then foil, and freeze for up to 3 months. Thaw overnight in the refrigerator, then top with the fresh whipped cream and serve.
Nutritional values are based on one serving
Calories: 534kcal, Carbohydrates: 37g, Protein: 5g, Fat: 41g, Saturated Fat: 23g, Cholesterol: 132mg, Sodium: 132mg, Potassium: 166mg, Fiber: 2g, Sugar: 23g, Vitamin A: 1060IU, Vitamin C: 1mg, Calcium: 50mg, Iron: 2mg
Photography by Ari Laing.